VNC консоль — локальный доступ к виртуальному серверу. Установка VNC сервера, и настройка его работы поверх SSH Vnc сервер что
Введение в VNC. Материал ориентирован на неопытного пользователя.
VNC - это широко распространенный метод удаленного доступа к рабочему столу компьютера по сети. Данные о нажатии клавиш и движении мыши, выполняемых пользователем на собственном компьютере передаются по сети на удаленный компьютер и воспринимаются им действия с его собственными клавиатурой и мышью. Информация с экрана удаленного компьютера выводится на экране компьютера пользователя. Работа по VNC через интернет с удаленным компьютером, находящимся в противоположной точке мира, для пользователя выглядит так, как будто этот компьютер находится непосредственно перед ним. Особенно VNC удобен при работе с графическим интерфейсом - с рабочим столом и программами для рабочего стола операционных систем Windows, Linux и других.
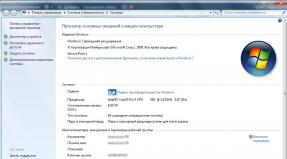
1. VNC-клиент на компьютере пользователя под управлением ОС Windows, с открытым рабочим столом VDS (виртуального сервера), работающего под управлением Ubuntu 9.10.
Для начинающих пользователей администрирование Unix-сервера по VNC будет намного проще, чем через командную строку по SSH или панель управления с веб-интерфейсом. Программы с графическим интерфейсом, как правило, хорошо структурированы и более интуитивны в понимании, чем редактирование конфигурационных файлов по инструкциям. Администрирование сервера выглядит почти так же, как настройки десктопной версии операционной системы, будь то Linux или Windows. Можно даже установить на собственный компьютер аналогичную версию операционной системы для тренировки, и переходить к администрированию VDS/VPS уже после того, как будут понятны основные принципы настройки системы.
Для администрирование собственного сервера по VNC пользователю достаточно уметь работать с графическим оконным интерфейсом и иметь базовое представления о главных компонентах операционной системы - файловая система, сеть, работа сервисов (демонов).
На удаленном компьютере должна быть запущена программа-сервер (VNC server), которая играет роль клавиатуры, мыши и монитора, и обменивается данными с компьютером пользователя. Доступ к VNC-серверу может быть защищен паролем.
На компьютере пользователя должна быть запущена программа-клиент (VNC client, VNC viewer), которая передает на удаленный компьютер информацию о нажатиях на клавиши и движениях мыши, получает от него изображение и выводит его на экран. VNC-клиенты существуют для Windows, Linux, FreeBSD, MacOS и многих других платформ. Есть также VNC-клиенты для карманных компьютеров и мобильных телефонов. При запуске VNC-клиента достаточно указать DNS-имя или IP-адрес удаленного компьютера, и пароль, если доступ к VNC-серверу защищен паролем.
Основной объем передаваемых по VNC данных приходится на графический информацию, выводимую на экран. Для работы требуется ширина пропускания канала от 32 Кбит/сек до 2 Мбит/сек. Для комфортной работы в полноцветном режиме при разрешении экрана 1024x768 скорость канала должна быть 1-2 Мбит/сек. При снижении качества графики, при уменьшении числа цветов и при некоторых дополнительных способах оптимизации, приемлемое удобство может обеспечить скорость 128 Кбит/сек. Канал занимается полностью только при обновлении больших участков экрана, при печати текста трафик заметно меньше, а в остальное время канал практически не используется. Если при передаче по каналу возникают большие задержки передачи пакетов (медленные каналы, спутниковая связь, большие расстояния), это вызывает ухудшение времени реакции на нажатие клавиш и движение мыши, что значительно снижает комфортность работы.
- System hardware meeting OS requirements
- Windows-compatible graphics card
- Windows-compatible network card
- TCP/IP v4 network stack
- Windows 98 1
or Windows Me 1
or Windows NT 4.0 Workstation / Server 2
or Windows 2000 Professional / Server
or Windows XP Professional / Home 3
or Windows 2003 Server 3
- These platforms do not support secure settings
- Service Pack 3, 4, 5 or 6a is required on these platforms
- If Fast User Switching or Remote Desktop are used, then VNC Server will connect session zero to the console in order to allow it to be accessed. Other sessions cannot be accessed by VNC Open 4.1 Server.
Installation
VNC Server for Windows is installed as an optional component of the setup package. If VNC Server has been installed then a number of icons will be created for it under the Start Menu , at the location specified during installation (usually RealVNC ).
VNC Server for Windows is designed to run either in User-Mode, as a personal per-user server, or in Service-Mode, as a system service available whether or not there is a user logged in.
The logged-on user can also choose to run their own personal User-Mode server alongside an existing Service-Mode server installed on the machine, provided that the two servers are configured to operate on different network port numbers.
Upgrading from VNC Open 4.0
VNC Server 4.1 retains full compatibility with VNC Server 4.0, with respect both to command-line parameters and to registry configuration options. When installed on a system that has already been fully configured for VNC Server 4.0, VNC Server 4.1 will use the existing settings, without the need for reconfiguration.
Using VNC Server in User-Mode
If you are just trying out VNC, or wish to provide access to your desktop infrequently for support or collaboration purposes, then you may find it best to run VNC Server in User-Mode.
During the installation, leave the tickboxes which refer to the VNC Server System Service unticked, to prevent VNC Server being installed in Service-Mode on your system.
When you want to use VNC Server, go to the VNC Server (User-Mode) program group (usually found under RealVNC in the Start Menu ), and click on Run VNC Server . The VNC Server icon will appear in the system tray, to indicate that VNC Server is running.

At this point, you probably want to configure your personal VNC Server settings for User-Mode. Right-click on the tray icon and select Options... , change the settings you want and click Apply or Ok . Note that you must at least configure the Authentication
When you are finished with VNC Server, simply select Close VNC Server from the tray icon"s menu.
Using VNC Server in Service-Mode
If you intend to use VNC to provide remote access to a computer, you will probably prefer to install VNC Server in Service-Mode. In Service-Mode, VNC Server can allow remote connections even while the computer is locked or logged off. The server is configured once, rather than per-user, and the settings are secured if the host platform supports it.
During the installation, tick each of the boxes which refer to the VNC Server System Service. This will cause the installer to present the VNC Server Options dialog, and to register and run the VNC Server Service.
Note that you must at least configure the Authentication tab, otherwise you won"t be able to connect in to your server - this is deliberately the case, to avoid accidentally opening up your computer to attacks.
At this point, your VNC Server is running and you should be able to connect to it from a connected computer using VNC Viewer.
If you need to reconfigure or stop your Service-Mode server, you will find links in the VNC Server (Service-Mode) program group of the Start Menu to achieve this. The VNC Server Properties dialog can also be accessed by right clicking on the VNC Server (Service-Mode) tray icon and selecting the Options... menu item.
Configuring VNC Server
VNC Server provides a number of options allowing its behaviour to be tailored to your needs. These are usually configured via the Options... dialog, although they can also be specified directly on the command-line of the WinVNC4 executable if required.
The Options... dialog consists of a number of pages of options, grouped according to their function. The following documentation describes each option and the equivalent command-line parameters.
When the Ok or Apply buttons of the Options... dialog are pressed, any changed settings are saved to the registry. Unless otherwise specified, changed settings take effect immediately.
Connections

PortNumber=(port number)
If this option is ticked and the port number is non zero then VNC Server accepts incoming connection requests from clients on a particular TCP port. The standard VNC Display numbers, 0-99, correspond to TCP ports 5900-5999. VNC Server will accept connections on port number 5900 by default, which equates to VNC display number 0 (zero). The port number for VNC Server to use can be set to any other available port number, even ones outside the 5900-5999 range.
Disconnect idle clients afterIdleTimeout=(seconds)
An idle client is one which has transmitted no keyboard or pointer events for more than a certain length of time. The VNC Server can be configured with a threshold, expressed in seconds, after which idle clients will be disconnected to conserve resources. If the threshold specified is zero seconds then connections will never timeout. The default idle timeout is one hour.
Note that pointer and keyboard events received from clients will prevent their connection timing out even if the VNC Server is configured to otherwise ignore those events (see below).
Serve Java viewer via HTTP on portHTTPPortNumber=(port number)
If this option is ticked and the port number specified is non-zero then VNC Server will accept incoming HTTP requests, allowing the Java VNC Viewer to be downloaded by a Java-aware web browser. The Options... dialog will attempt to adjust the HTTP port to match changes made to the VNC port number.
Note that the HTTP port number cannot be set to the same value as that used for incoming VNC connections.
Only accept connections from the local machineLocalHost=true|false
The LocalHost option tells VNC Server to only accept incoming connections from Viewers running on the local host computer. This is only normally used when connections are to tunnelled through a custom transport (e.g. serial line, custom wireless, etc) and will therefore appear to the TCP stack to originate from the local host. If VNC Server is configured to accept connections only via local loopback then the Hosts option is ignored.
Access ControlHosts=(pattern)
VNC Server can filter incoming connection attempts based upon the apparent IP addresses of their originators. Which IP addresses are allowed to connect and which are not is determined by the Hosts pattern. The pattern consists of a comma-separated list of IP address specifications, prefixed by an action . Each specification starts with an action, gives an IP address, and a subnet-style mask. The first specification to match the address of the new connection determines the action that will performed.
Available actions are:
- + : Accept the connection
- ?
: Query the local user to accept the
connection.
See also the QueryConnect Authentication option. - - : Reject the connection.
e.g. Hosts=+192.168.0.1/255.255.255.255,+192.168.1.0/255.255.255.0,-
The pattern given above allows the computer with address 192.168.0.1 to connect, as well as any computer in the 192.168.1 subnet. All other connections are rejected by the - term, which is actually redundant in this case - a connection will always be rejected if it doesn"t match anything in the Hosts pattern.
Note that IP addresses and masks are specified in Type-A (xxx.yyyyyyyyy), Type-B (xxx.yyy.zzzzzz) or Type-C (xxx.yyy.zzz.www) form. The specification 192.168 will therefore be interpreted as 192.0.0.168 rather than 192.168.0.0 as one might expect.
The Hosts pattern can be edited more easily through the Access Control interface, which allows IP address specifications to be edited individually and moved up (to match first) or down (to match last) the list.
Authentication

The Authentication page allows you to configure the required mode of authentication and level of security of VNC connections. VNC Open Server for Windows supports unauthenticated connections and classic VNC Password Authentication.
No AuthenticationSecurityTypes=None
If your VNC Server is operating in a protected environment, such as a secure LAN or firewall-protected network, then you may wish to configure VNC Server to accept connections without requiring a username or password to be specified.
We advise extreme caution when disabling authentication. Do not disable it unless you are absolutely sure that the host network is completely secure.
VNC Password AuthenticationSecurityTypes=VncAuth
VNC Password Authentication allows a single password of up to 8 characters to be stored by VNC Server, which remote users must supply when prompted in order to authenticate.
The password to use can be configured by selecting Configure and typing the new password twice. On platforms which support it, the password (and all other configuration options) are protected using native operating system security methods, so that the password cannot be read or tampered with by other users.
NT Logon AuthenticationNT Logon Authentication is not available in VNC Open.
Encryption: Always OffEncryption is not available in VNC Open.
Prompt local user to accept connectionsQueryConnect=true|false
By default, VNC Server allows Viewers to connect as long as the correct username and password are supplied. QueryConnect allows an extra level of protection to be applied, requiring a local user to explicitly accept incoming connections.
When QueryConnect is enabled, incoming connections are first authenticated in the normal way. If the user authenticates successfully then a dialog is presented on the server"s desktop, displaying the IP address and username of the incoming connection, and requiring a local user to accept the connection.
If the user does not accept the connection within a specified timeout then it is rejected. If an incoming connection requiring acceptance by the local user is received while an earlier connection is being queried then the second connection is automatically rejected, for security reasons.
Connections from specific hosts or subnets can be configured to be queried via the Hosts configuration setting.
Only prompt when there is a user logged onQueryOnlyIfLoggedOn=true|false
This option affects the behaviour of the QueryConnect option, if enabled. If this option is set then the local user will only be prompted to accept the incoming connection if they are logged in. If this option is not set then the local user will always be prompted, regardless of whether or not they are logged in.
Note that it is not possible to reliably detect whether or not a user is logged in on some older Windows platforms. On these platforms, this option will err on the side of security and always prompt the local user.
QueryConnectTimeout=(seconds)
If QueryConnect is enabled then the Query Connection dialog will be displayed by default for ten seconds before automatically rejecting the connection. The timeout value can be modified by setting QueryConnectTimeout accordingly.
Inputs

AcceptPointerEvents=true/false
If this option is unticked then incoming pointer movements from all clients will be ignored, preventing any remote VNC Viewer from affecting the pointer of the VNC Server"s desktop. This can be used to configure a server to become effectively view-only.
Note that a client will still be deemed active for the purposes of the IdleTimeout setting if it is sending pointer events to the server, whether or not they are accepted.
Accept keyboard events from clientsAcceptKeyEvents=true/false
If this option is unticked then incoming keystrokes from all clients will be ignored, preventing any remote VNC Viewer from typing into the VNC Server"s desktop. This can be used to configure a server to become effectively view-only.
Note that a client will still be deemed active for the purposes of the IdleTimeout setting if it is sending keyboard events to the server, whether or not they are accepted.
Accept clipboard updates from clientsAcceptCutText=true/false
If this option is unticked then incoming clipboard updates will be ignored from all clients. This option should be used when making a VNC Server effectively view-only, but may also prove useful to prevent clipboard changes made by clients from overriding the VNC Server"s local clipboard when this would be undesirable or confusing.
Send clipboard updates to clientsSendCutText=true/false
This option, if unticked, prevents the VNC Server from informing clients of changes to its local clipboard contents. This can be useful when untrusted clients are to be allowed to connect to the VNC Server, since it prevents any private data being accidentally leaked via the clipboard.
Allow input events to affect the screen-saverThis option determines whether keyboard and mouse events received from VNC Viewers can cause the screen-saver to be hidden. This option is actually a system-wide setting and is not implemented by VNC Server itself, so there is no equivalent command-line option. Some older Win32 platforms do not support this option. It is recommended that this check-box be ticked, so that the screen-saver can be disabled by VNC Viewer input.
Disable local inputs while server is in useDisableLocalInputs=true/false
The mouse and keyboard physically attached to the server computer can be disabled for the duration of a remote connection, preventing local users from interacting with the computer.
Sharing

AlwaysShared=true
If this option is set then all incoming connections will be treated as shared, and thus not disconnect any existing connections, regardless of whether the connecting VNC Viewer requested that the connection be shared.
Never treat new connections as sharedNeverShared=true
If this option is set then all incoming connections will be treated as non-shared. VNC Server will therefore either disconnect any existing connections, or refuse the incoming connection, depending on whether non-shared connections are configured to replace existing ones (see below).
Use client"s preferred sharing settingAlwaysShared=false, NeverShared=false
When connecting, VNC Viewer specifies whether the connection should be shared or non-shared. If this setting is configured then the VNC Viewer"s preference will be respected.
Non-shared connections replace existing onesDisconnectClients=true/false
If an incoming connection is to be shared (either by choice or because AlwaysShared is set) then existing connections remain active. If a connection is non-shared (either by choice or because NeverShared is set) then either the new connection must be rejected, or existing clients disconnected.
If this setting is configured then existing clients will be disconnected when a new non-shared connection is made. Otherwise, they will remain, and the new connection will fail.
Desktop

While connected
Decorations such as wallpaper or font smoothing effects can make it harder for VNC Server to compress graphical data for trasmission to viewers. For viewers connected over slower networks, this can significantly degrade the apparent performance of the server. VNC Server can therefore simplify the desktop in several ways, to improve performance.
Remove wallpaperRemoveWallpaper=true
This option causes VNC Server to remove any standard wallpaper bitmap that is set, as well as to disable Active Desktop components.
Remove background patternRemovePattern=true
This option causes VNC Server to set the desktop background to a plain pattern while conenctions are active.
Disable user interface effectsDisableEffects=true
This option causes VNC Server to disable desktop decorations such as font smoothing, window titlebar shading, menu animation, and so on.
When last client disconnects
These options are used to ensure that if VNC connections to a server are closed because of a network error, idle timeout, or even deliberately, then the computer will be left in as secure a state as possible. On Windows 2000 and above, it is possible for VNC Server to lock the workstation, leaving the current user logged in but requiring that their password be re-entered in order to access their programs or data. Alternatively, VNC Server can completely logoff the current user when there are no more VNC viewers connected, closing any running programs and leaving the workstation ready for another user to log in.
Do nothingDisconnectAction=None
This option tells VNC Server not to perform any action.
Lock workstationDisconnectAction=Lock
This option causes VNC Server to lock the workstation when the last VNC viewer disconnects.
Note that this option is not available on Windows 95/98/Me and Windows NT 4.
Logoff userDisconnectAction=Logoff
This option causes the current user to be logged off when the last VNC viewer disconnects.
Capture Method

VNC Server is designed to support a variety of techniques for tracking changes to the local desktop. This release supports basic polling of the screen for changes, as well as the classic VNC Hooks technique.
Poll for changes to the desktopUpdateMethod=0
If this option is selected then VNC Server will poll strips of the screen for changes. The polling mechanism attempts to minimize the load on the server computer while delivering a reasonable level of responsiveness.
Use VNC Hooks to track changesUpdateMethod=1
This option tells VNC Server to use the classic VNC Hooks technique to track graphical updates. This scheme is more efficient than continuous polling but relies on certain properties of Windows applications and so can "miss" updates in some situations. VNC Hooks will also poll the screen infrequently to catch any missed updates.
Poll console windows for updatesPollConsoleWindows=true/false
The VNC Hooks hooking technique cannot track console windows because of limitations in the operating system. Instead, console windows may be polled for changes. If this option is set then VNC Server will track the visible parts of console windows and poll those areas for changes.
Use VNC Mirror driver to track changes The VNC Mirror driver is not supported by VNC Open. Capture alpha-blended windowsUseCaptureBlt=true/false
This option selects between two screen capture methods. If UseCaptureBlt is false then the faster of the two methods is used, which may in some cases cause alpha-blended windows and tool-tips not to be visible remotely. If UseCaptureBlt is true then these windows will be visible remotely but the VNC Server overhead will be increased.
Note that one aspect of the extra server overhead is that the local cursor will flicker if UserCaptureBlt is enabled.
Legacy

If you have configured WinVNC 3.3 on a machine then you can automatically have VNC Server 4 configure itself to match your existing 3.3 settings as closely as possible. VNC Server 4 will warn you when it cannot match existing settings completely, or if they are no longer relevant.
If you choose to import settings to configure a User-Mode VNC Server then VNC Server will attempt to import your personal WinVNC 3.3 settings. If you choose to import settings to configure a Service-Mode VNC Server then the WinVNC 3.3 Default settings on the local machine will be used.
Note that you must separately uninstall the WinVNC 3.3 service if you import the settings into VNC Server 4, or configure VNC Server 4 to operate on a different port number.
Only use protocol version 3.3Protocol3.3=true/false
VNC Server 4 supports both the original VNC version 3.3 protocol, and the new VNC protocol version 3.8. Some third-party VNC software use non-standard version numbers which may cause incompatibility issues. VNC Server 4 can therefore be configured only to use the original VNC protocol version, ensuring compatibility even with non-standard VNC Viewers.
Note that this option applies to all VNC connections and reduces the functionality available to connecting VNC Viewers.
Other Options
In addition to the settings described above, the VNC server supports several advanced options. These options can be set on the command-line or by adding an appropriate value to the Windows registry. For User-Mode servers, this value should be added under the HKEY_CURRENT_USER\Software\RealVNC\WinVNC4 key; for Service-Mode servers, the appropriate key is HKEY_LOCAL_MACHINE\Software\RealVNC\WinVNC4 .
DisableClose=true/false
Disable or enable the Close menu item in the system tray menu. Note that this does not prevent users from shutting down the WinVNC4 process using the Task Manager or the Service Control Manager if they have sufficient access rights to do so.
DisableOptions=true/false
Disable or enable the Options... menu item in the system tray menu. Note that this does not prevent users from changing the settings in the Windows registry if they have sufficient access rights to do so.
DisplayDevice=<display >
The display device to remote, or empty to remote all displays. The format of display is \\.\<device > . For example, \\.\display1 .
RemapKeys=<mapping >
Keyboard remapping. mapping is a comma-separated string of character mappings, each of the form char ->char or char <>char , where char is a hexadecimal keysym. For example, to exchange the " and @ symbols you would specify the following:
RemapKeys=0x22<>0x40
For a full list of options, run winvnc4 -help .
Compatibility Notes
Windows 3.11 / Windows NT 3.51 / Windows 95
VNC Open is not designed to operate on Windows 3.11 or older, Windows NT 3.51 or Windows 95.
Windows 98 / Windows Me
VNC Open is designed to operate on both Windows 98 and Windows Me. Because these platforms are inherently insecure, it is not possible to protect the VNC Server settings from unauthorized access.
Windows XP and Windows 2000 Server
VNC Server is only capable of providing access to session zero. If a different user session is the active console session whena VNC viewer connects, VNC Server will attempt to make session zero the console session.
25 ноября 2009 в 13:21Подключение к удаленному компьютеру по VNC
- Настройка Linux
Работа с VNC-клиентом. Материал ориентирован на неопытного пользователя.
1. Установка VNC-клиента
2. Подключение VNC-клиента к удаленному компьютеру
3. Отключение VNC-клиента от удаленного компьютера
4. Тюнинг VNC-клиента
5. Частые проблемы
Для работы с удаленным компьютером по VNC на компьютере пользователя нужно запустить программу-клиент (VNC viewer, VNC client). Эта программа передает на удаленный компьютер данные о нажатиях на клавиши и о движениях мыши, сделанных пользователем, и показывает информацию, предназначенную к выводу на экран.
1. Установка VNC-клиента
Для ОС Windows можно бесплатно скачать и инсталлировать VNC-клиент UltraVNC и TightVNC .Mac OS X начиная с версии 10.5 имеет поддержку VNC-клиента в RemoteDesktop . Для предыдущих версий можно использовать VNC-клиенты JollysFastVNC и .
Для Linux ветви Debian (Ubuntu) VNC-клиент устанавливается из репозитория командой:
Apt-get install vncviewer
Для ветви RedHat (CentOS, Fedora) - командой:
Yum install vnc
Для FreeBSD VNC-клиент (TightVNC) устанавливается из пакетов командой:
Pkg_add -r tightvnc
2. Подключение VNC-клиента к удаленному компьютеру
Для подключения VNC-клиента к удаленному компьютеру требуется указать его IP-адрес или DNS-имя, и номер дисплея (по умолчанию, :0) или номер TCP-порта (по умолчанию, 5900). Если VNC-сервер требует авторизации, то при подключении к нему VNC-клиент запросит пароль. Обратите внимание, что пароль доступа к VNC-серверу не связан с каким-либо аккаунтом (учетной записью пользователя) на удаленном компьютере, а служит только для ограничения доступа к дисплею VNC-сервера.После установки соединения и открытия экрана, в зависимости от настроек VNC-сервера может потребоваться авторизация пользователя на виртуальном сервере или может быть открыта уже запущенная рабочая сессия какого-либо пользователя.
Так как на компьютере одновременно могут работать несколько VNC-серверов, для их разделения используют параметр номер дисплея . Например, один VNC-сервер может быть запущен на дисплее:0, другой - на дисплее:1. Каждому номеру дисплея соответствует номер TCP-порта, на котором VNC-сервер принимает соединения. Номер порта для дисплея получается прибавлением номера дисплея к базовому номеру порта - 5900. Дисплею:0 соответствует TCP-порт 5900, дисплею:1 - порт 5901.
3. Отключение VNC-клиента от удаленного компьютера
При закрытии окна VNC-клиента или после выхода из окружения средствами рабочего стола, в зависимости от настроек VNC-сервера, рабочая сессия пользователя может закрыться с остановкой всех используемых программ, или продолжать работу и быть доступной снова при повторном подключении к VNC-серверу.4. Тюнинг VNC-клиента
Большое количество передаваемой на экран информации влечет за собой повышенные требования к скорости канала - к его пропускной способности и времени передачи пакетов. Нахватка пропускной способности приводит к некомфортным задержкам при больших изменениях показывамой на экране информации - открытии новых окон, скроллинге и т.д. Особенно большие задержки будут возникать при показывании фотографий и других изображений или элементов интерфейса, имеющих большое количество цветов и сложные формы.Главный параметр, который влияет на объем передаваемых данных - алгоритм кодирования передаваемой графики. Для уменьшения объема и, соответственно, ускорения работы, рекомендуется использовать алгоритмы Tight, ZLib, ZRLE - по сравнению с несжатыми данными (Raw), они обеспечивают сжатие в десятки раз, заметно нагружая процессор. Эти алгоритмы кодирования обеспечивают комфортную работу даже на каналах со скоростью 256-512 Кбит/сек.
Для сокращения объема передаваемой по сети информации также можно устанавливать высокий уровень сжатия (Compression Level, Compression Value), низкий уровень качества JPEG (JPEG Quality) и включать режим уменьшения количества цветов (-bgr233, Restricted colors). Самый большой эффект из них при заметном снижении качества изображения дает режим уменьшения количества цветов - объем передаваемой информации уменьшается в 1.5-3 раза, соответственно, в 1.5-3 раза ускоряется отображение на экране.
JPEG применяется алгоритмом кодирования Tight для сжатия участков экрана, содержащих фотографии и другие сложные изображения с большим числом цветов. Использование Tight+JPEG сокращает в 2-5 раз объем передаваемых при этом данных. Другие алгоритмы кодирования JPEG не поддерживают.
1. Выпадающего меню «Система -> Параметры»
Объем передаваемых данных и скорость отображения на канале 1 Мбит/сек при открытии выпадающего меню «Система -> Параметры» (на рисунке меню выделено зеленым пунктиром):
5. Частые проблемы
Не удается подключиться к VNC-серверу
Нужно проверить:- есть ли доступ к интернету;
- отвечает ли виртуальный сервер на пинги;
- запущен ли на виртуальном сервере VNC-сервер;
- нет ли по пути файервола, закрывающего доступ к TCP-порту VNC-сервера;
- правльно ли указан номер дисплея или TCP-порт VNC-сервера (номер порта = 5900 + номер дисплея).
Медленная работа через достаточно быстрый канал
Если VNC-клиент не может согласовать с VNC-сервером использование алгоритм кодирования графики с компрессией данных, выбирается алгоритм по умолчанию - Raw, который передает данные без сжатия. Также кодирование без сжатия или с низким уровнем сжатия может автоматически выбираться VNC-клиентом при работе через быструю локальную сеть. Данную проблему можно исправить, принудительно указав в настройках VNC-клиента алгоритм кодирования с высоким уровнем сжатия - ZLib, ZRLE, Tight.Однако, для некоторых сочетаний клиента и сервера такое решение может быть бесполезным из-за ошибок в согласовании алгоритма кодирования. Например, клиент TightVNC с сервером RealVNC часто могут работать только с кодировкой Raw. Решением в этом случае будет смена VNC-клиента или VNC-сервера.
VNC - это система удаленного управления десктопом компьютера. Пользователь VNC клиента видит изображение десктопа VNC сервера и управляет им мышью и клавиатурой так же, как своим собственным компьютером.
VNC сервер можно запустить на рабочем комьютере, и по необходимости заходить на него из дома. Или наоборот. Для соединения надо убедиться, что TCP порт, используемый сервером (по умолчанию 5900) доступен для входящих соединений от клиента.
UltraVNC берется на . Другие известные реализации VNC - RealVNC и TightVNC , еще варианты можно найти . Теоретически они все совместимы между собой, хотя некоторые специальные функции (clipboard или file transfer) могут между разными реализациями не работать.
Помогаем новичкам
Удобен VNC и для помощи другим пользователям. Помогать, видя происходящее на экране, гораздо проще.
Однако у очень многих стоят раутеры и файерволы, и нереально требовать от новичка умения открыть для входящих соединений нужный порт. Нам на помощь приходит reverse connection (обратное соединение). В этом режиме соединение инициирует VNC сервер.
Опытный пользователь запускает у себя VNC клиент в listening mode (режиме слушания порта) (vncviewer.exe /listen ) и делает у себя порт 5500 доступным снаружи. Новичку остается только скачать и запустить VNC сервер и соединиться с клиентом по указанному IP адресу.
Вот специальная страница с инструкциями для новичка. Думаю, опытному пользователю подробные инструкции не нужны. Отмечу только, что во время соединения clipboard становится общим, и что если у новичка разрешение экрана больше вашего, то в клиенте можно масштабировать изображение до приемлемого размера.
Дополнительно
Достоинства VNC - многоплатформенность и бесплатность. Если у вас везде стоит Windows XP, то для удаленного доступа вам вероятно подойдут и встроенные средства - Remote Desktop или Remote Assistance. Вроде бы их тоже можно соединять через reverse connection.
Если у вас динамический внешний IP адрес, удобно сделать себе (бесплатный) Dynamic DNS, например на dyndns.com . У вас на компьютере будет работать маленькая программка (а в некоторых раутерах есть такая встроенная функциональность), извещающая DynDNS сервис об изменениях вашего IP. Как результат, выбранный вами domain, к примеру pupkin.dyndns.org, будет всегда показывать на ваш текущий IP адрес
Если вы профессионально занимаетесь технической поддержкой, то вам может быть особенно удобен
. Это специальная облегченная версия VNC сервера, которая может делать только reverse connection и только на заранее сконфигурированные вами IP адреса. Конечно, тогда вы должны быть достаточно авторитетны для пользователя, чтобы он согласился скачать и запустить этот сконфигурированный VNC сервер с вашего собственного сайта.
(А, кого я тут обманываю... Многие пользователи и так запустят все, что им предложат)
Virtual Network Computing (VNC) — система для удаленного доступа к рабочему столу. Если вы представляете себе Remote Desktop или RAdmin, то VNC решает аналогичную задачу, только VNC-сервера распространяются бесплатно и с открытым исходным кодом. Важно отметить, что VNC не является протоколом. Используемый протокол называется Remote FrameBuffer (RFB). Этот протокол полностью описан в этом PDF .
Зачем кому-то поднимать VNC:
- Если пробрасывание UI по SSH слишком тормозит;
- Сервер используется как виртуалка, только с совместным доступом;
- Торрентокачалка с белым IP, просто ставим Transmission и вперед;
- Своего рода альтернатива проксям и VPN ;
- И прочее, на что фантазии хватит;
Приступим. Все описанные ниже шаги проверялись на Ubuntu Linux 14.04 LTS, но также должны без особых изменений работать на других версиях Ubuntu, а также других системах. Для эксперимента нам понадобится ненужная машина, возможно, виртуалка в каком-нибудь DigitalOcean , имеющая по крайней мере 512 Мб памяти. Если вы планируете запускать тяжелые GUI-программы вроде Google Chrome, то сразу выделяйте 1 Гб, а лучше и того больше. Если выделить только 512 Мб, вы сможете открыть только одну вкладу с GMail, после чего память закончится, я проверял. Меня лично очень печалит, что браузеры стали такими прожорливыми, но это, пожалуй, тема для отдельного поста.
На машине, где будем поднимать VNC, под рутом заводим нового пользователя:
adduser
ubuntu
usermod -G
sudo
ubuntu
Прописываем ему наш ~/.ssh/id_rsa.pub:
su
ubuntu
vim
~/
.ssh/
authorized_keys
chmod
0600 ~/
.ssh/
authorized_keys
У себя на компьютере в ~/.ssh/config дописываем:
Host vnc-server
Hostname 123.45.67.89
User ubuntu
LocalForward 5901 localhost:5901
В VNC не шифруется трафик, поэтому мы будем ходить в него, используя перекидывание портов по SSH. Если вы также собираетесь использовать технику проброса звука, описанную в заметке Осилил запуск GUI-приложений в Docker , добавьте строчку:
RemoteForward 3333 localhost:4713
Заходим на vnc-server под пользователем ubuntu, говорим:
sudo
apt-get update
sudo
apt-get install
xubuntu-desktop tightvncserver xfonts-base \
xfonts-75dpi xfonts-100dpi
Как вы могли заметить, в качестве конкретной реализации сервера был выбран TightVNC. Я имел опыт работы с ним несколько лет назад. Уже не помню точно, чем именно TightVNC тогда выделялся на фоне остальных VNC-серверов. Помню, что он был прост в установке и настройке, совместим со всеми клиентами и просто работал.
Правим файл ~/.vnc/xstartup, содержание должно стать примерно таким:
#!/bin/sh
Xrdb $HOME
/
.Xresources
xsetroot -solid
grey
startxfce4 &
(sleep
3
&&
xfce4-panel)
&
Запустить сервер:
vncserver:1 -localhost -nolisten tcp
Здесь аргумент :1 — это номер дисплея. Можно запускать несколько десктопов, работающих одновременно. Флаг -localhost означает принимать соединения только с этой же машины. Параметр -nolisten tcp нужен для того, чтобы порт 6001 не торчал наружу. При первом запуске сервера понадобится ввести пароль для доступа к десктопу. Обратите внимание, что пароль обрезается до восьми символов. Также вас спросят про отдельный пароль для view-only соединения:
Would you like to enter a view-only password (y/n)? n
Сменить пароль можно командой:
Остановить сервер:
vncserver -kill :1
Чтобы подключиться к работающему серверу, нужен какой-нибудь VNC-клиент. В Ubuntu по умолчанию идет Remmina. В маках, как мне рассказывали, VNC клиент находится в Finder → Connect to Server. В качестве адреса сервера указываем localhost:5901, оттуда соединение будет переброшено по SSH на порт 5901 VNC-сервера. В общем случае номер порта вычисляется, как 5900 + номер дисплея.
Дополнение: А во FreeBSD я делаю так:
sudo
pkg install
tightvnc
vncviewer -bgr233
localhost:5901
Если все было сделано правильно, вы увидите среду рабочего стола Xfce. Ее также следует немного донастроить. В Applications Menu → Settings → Session and Startup во вкладке Advanced ставим галочку Launch GNOME services on startup. Во вкладке Application Autostart отключаем разные лишние сервисы типа Bluetooth Applet. Иначе некоторые приложения, в частности, Skype, могут ронять вообще все иксы с очень странными ошибками в логах. Я лично оставил только следующие галочки:
Теперь прописываем VNC на автозапуск. В /etc/init.d/vncserver пишем.


